Raspberry Pi Imager Setup Guide
This guide walks through the process of preparing a microSD card for PiPiece using the Raspberry Pi Imager utility.
Prerequisites
- Raspberry Pi Imager installed on your computer
- microSD card (16GB or larger recommended)
- SSH public key (for secure authentication)
Step-by-Step Instructions
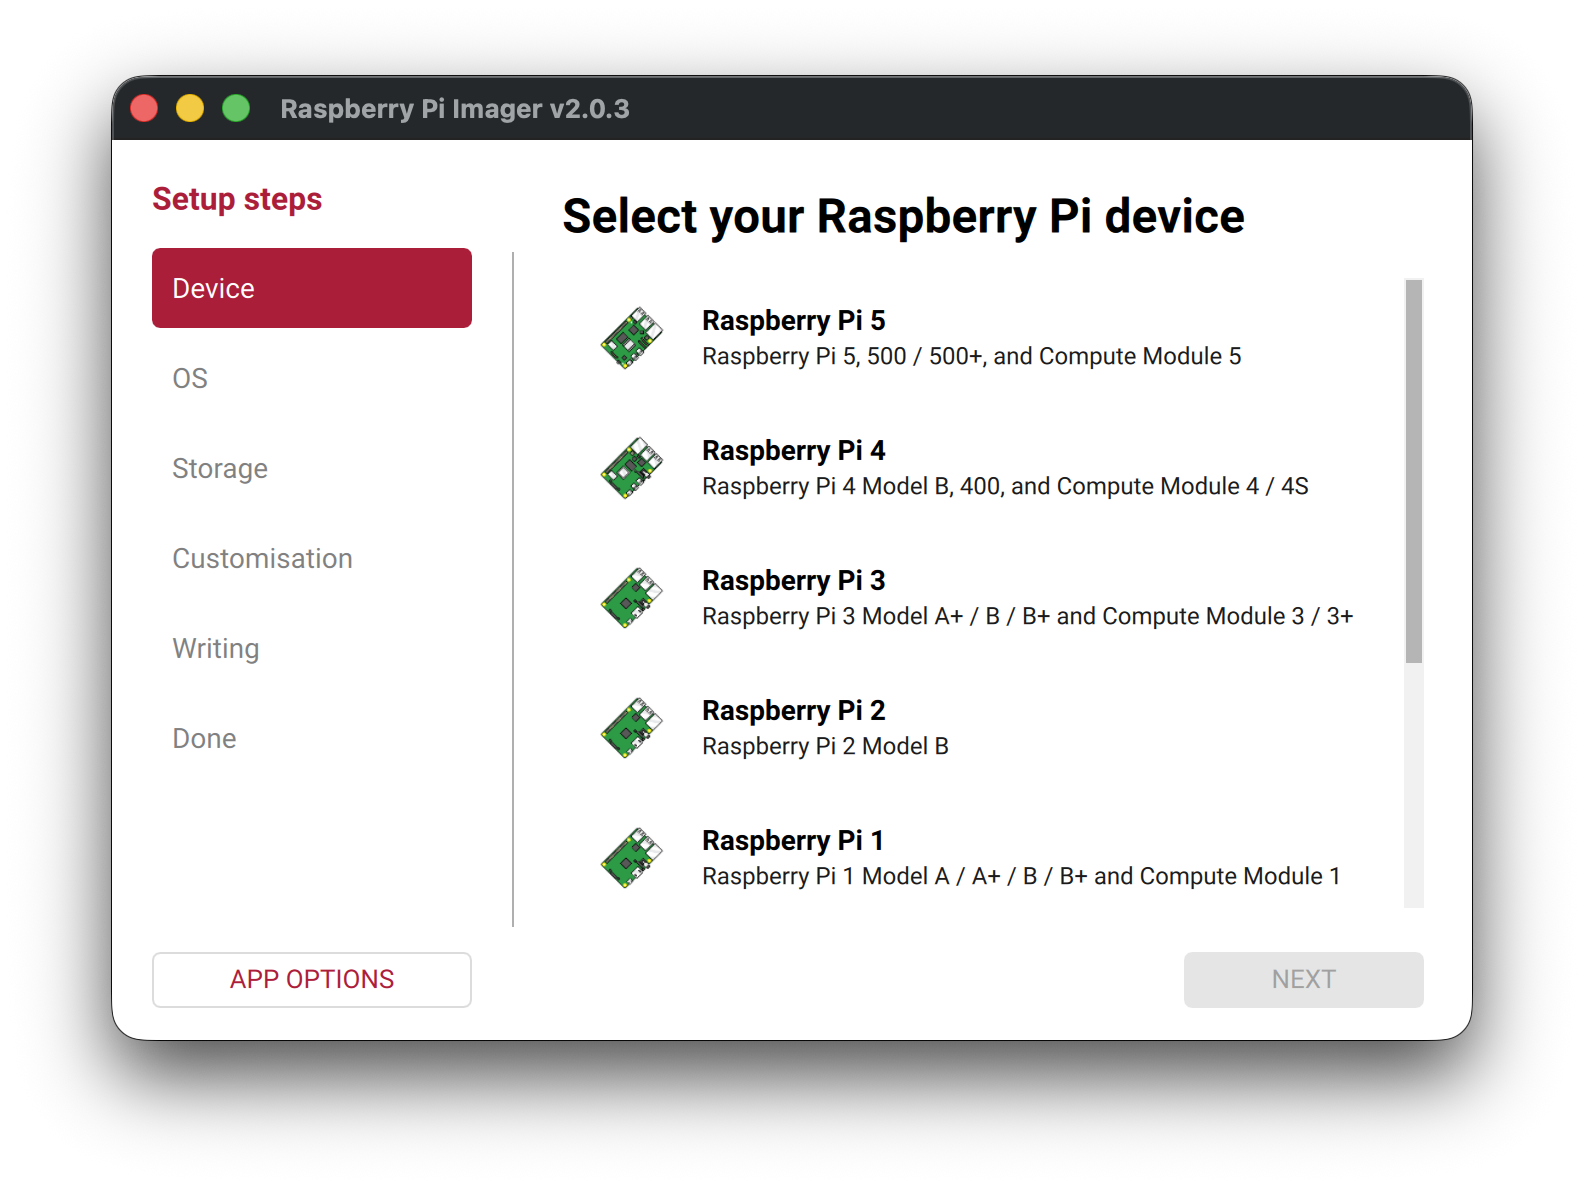
Step 1: Select Your Raspberry Pi Model
Choose your Raspberry Pi model from the list. This ensures the correct OS version and configuration for your hardware. Then click "NEXT".
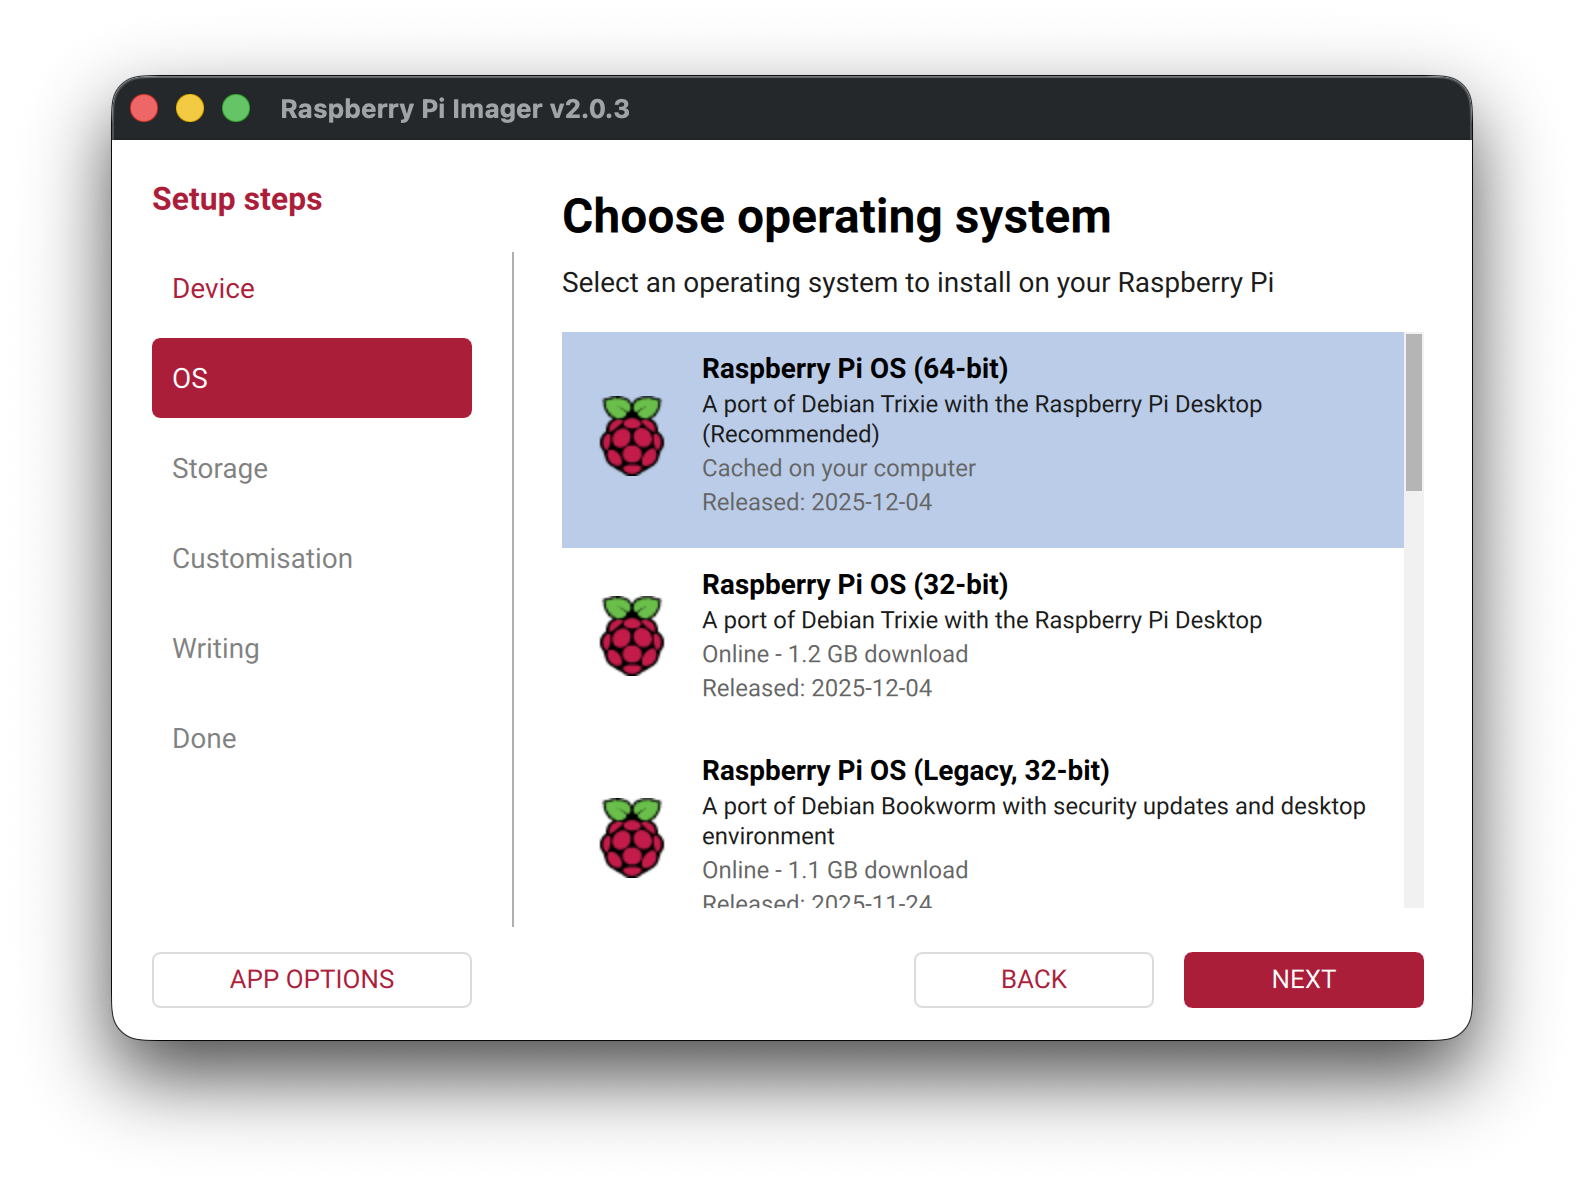
Step 2: Choose Operating System
For PiPiece, Raspberry Pi OS (64-bit) is recommended. Then click "NEXT".
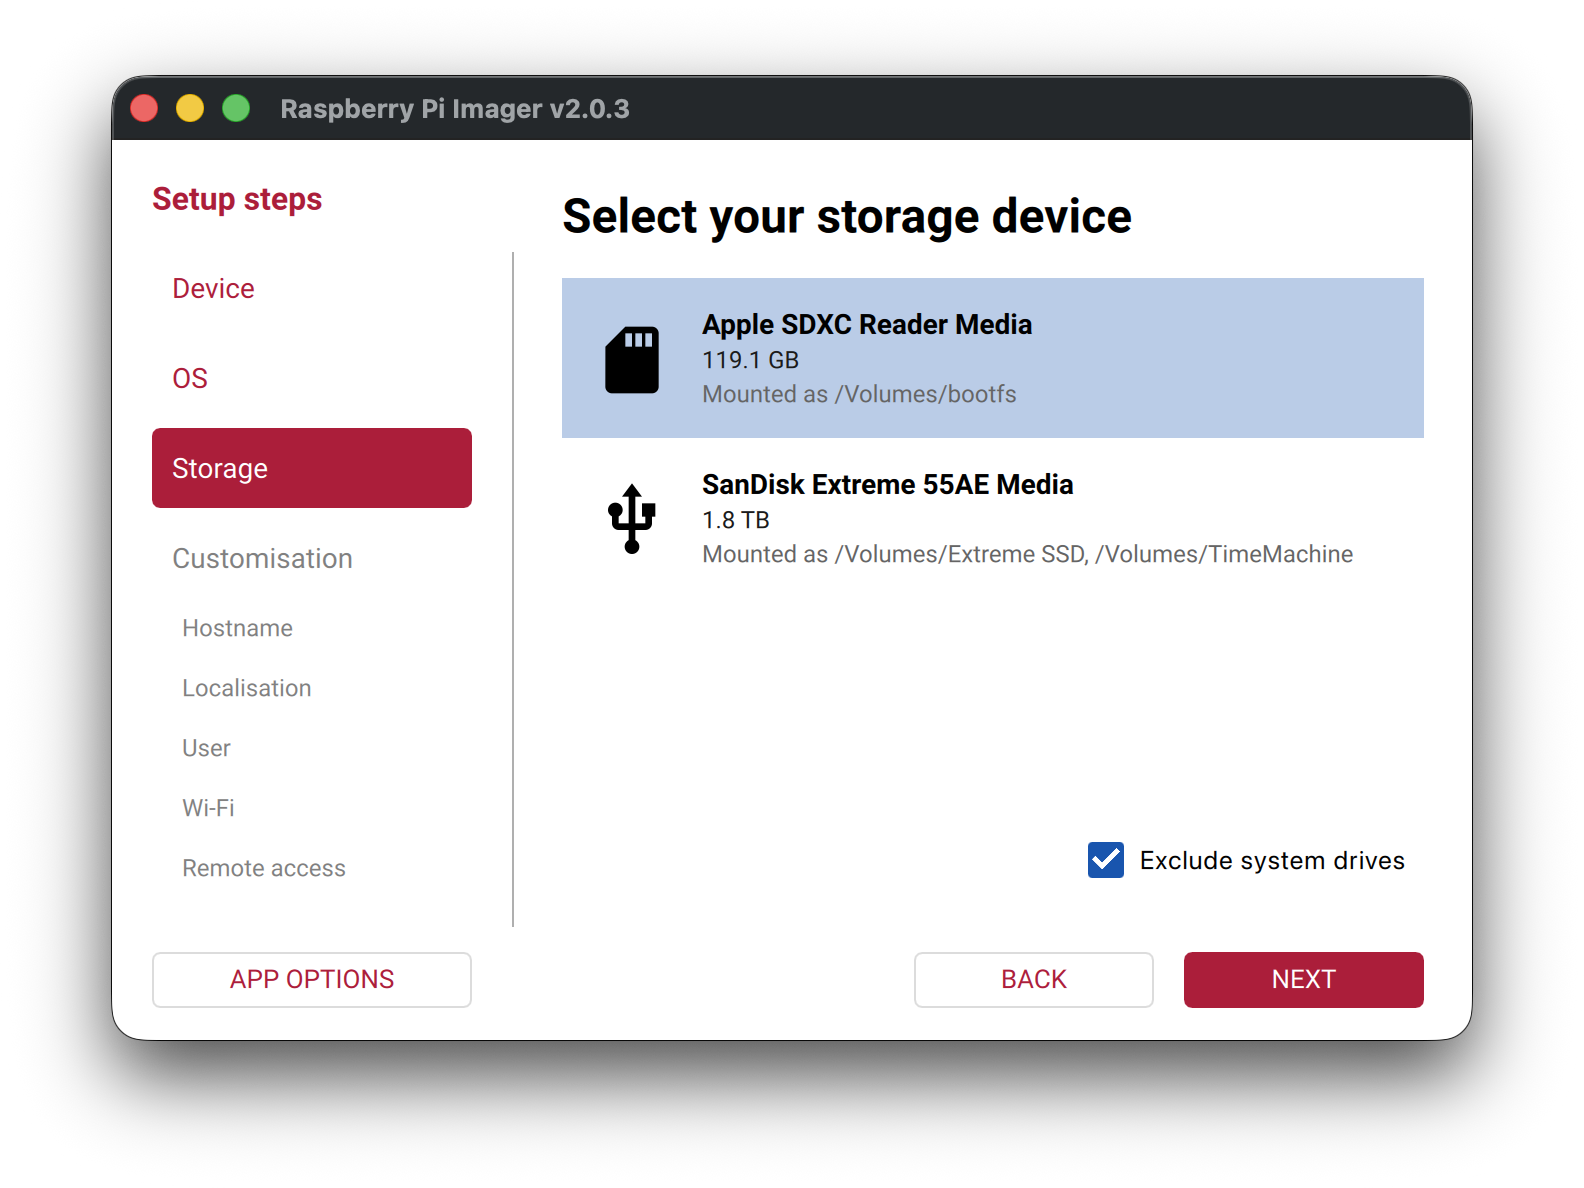
Step 3: Choose Storage
Select your microSD card from the list of available storage devices.
⚠️ Warning: All data on the selected storage device will be erased during this process.
Step 4: Choose hostname
- Hostname: Set to
pipiece(this is critical for the PiPiece system)
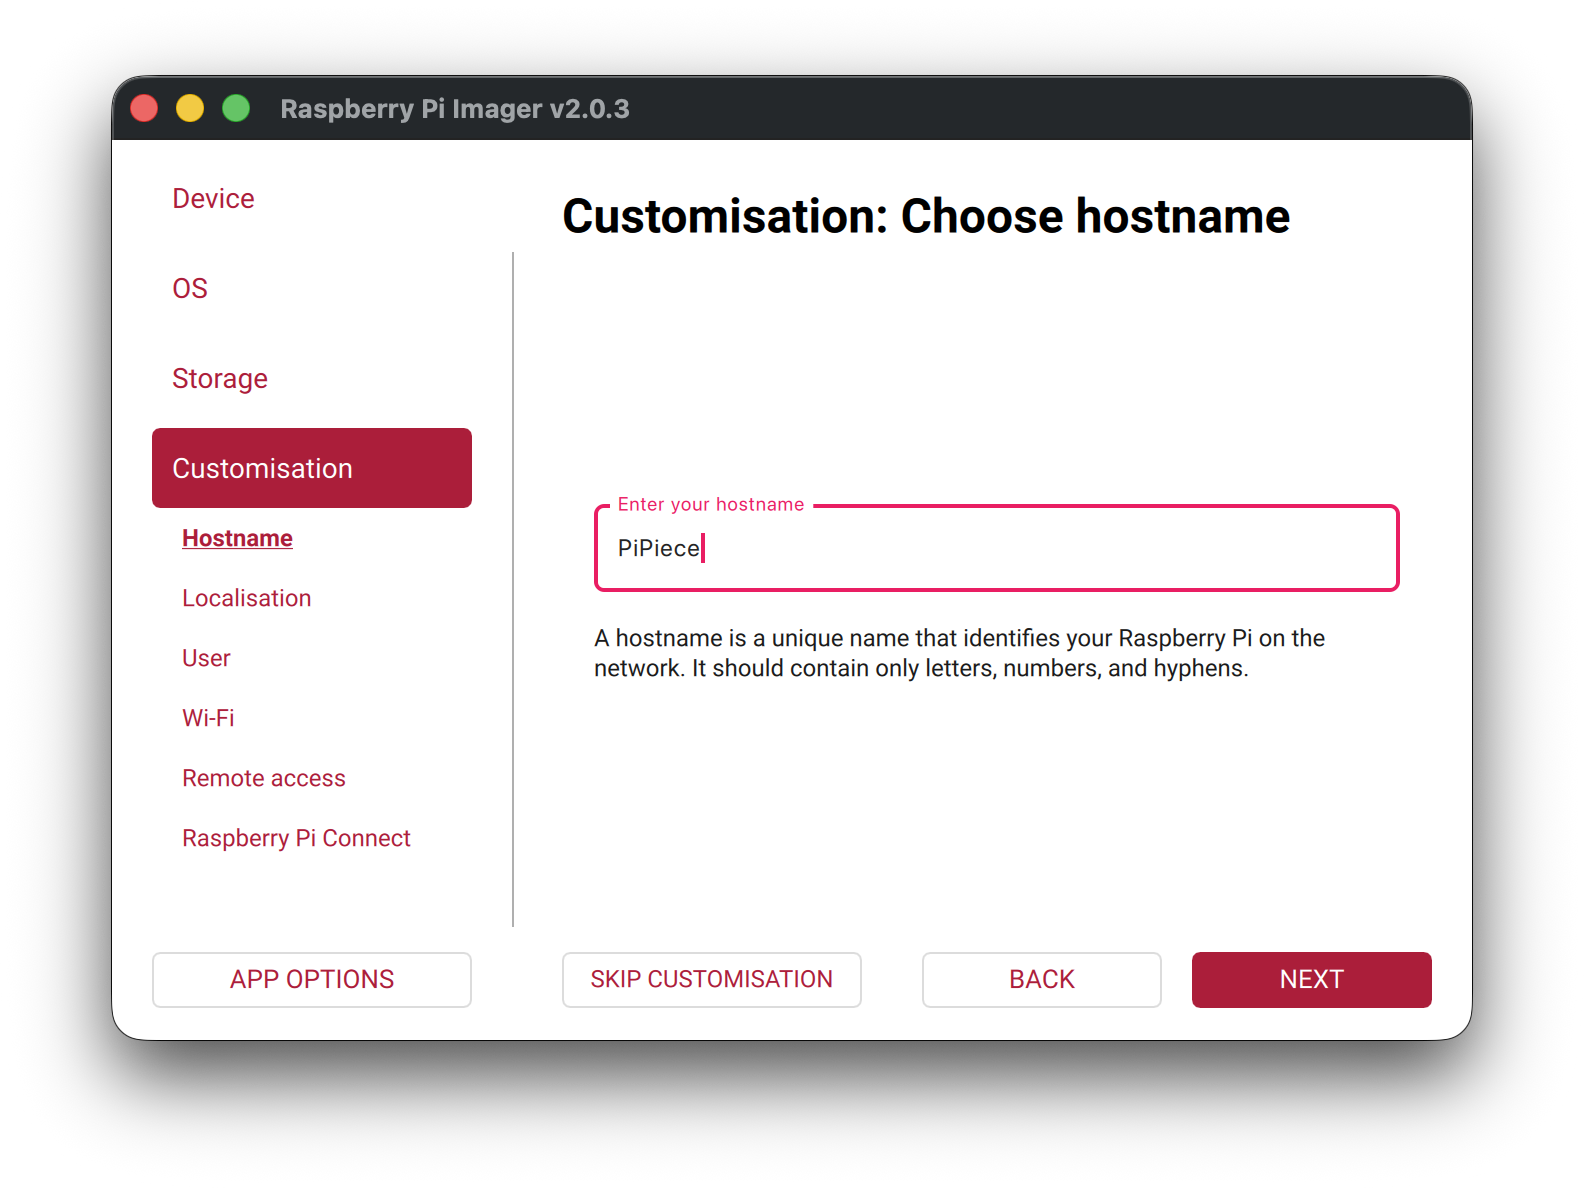
Important: The hostname
pipieceis used throughout the PiPiece system for network access (e.g.,http://pipiece.local). Using a different hostname will require updating configuration files.
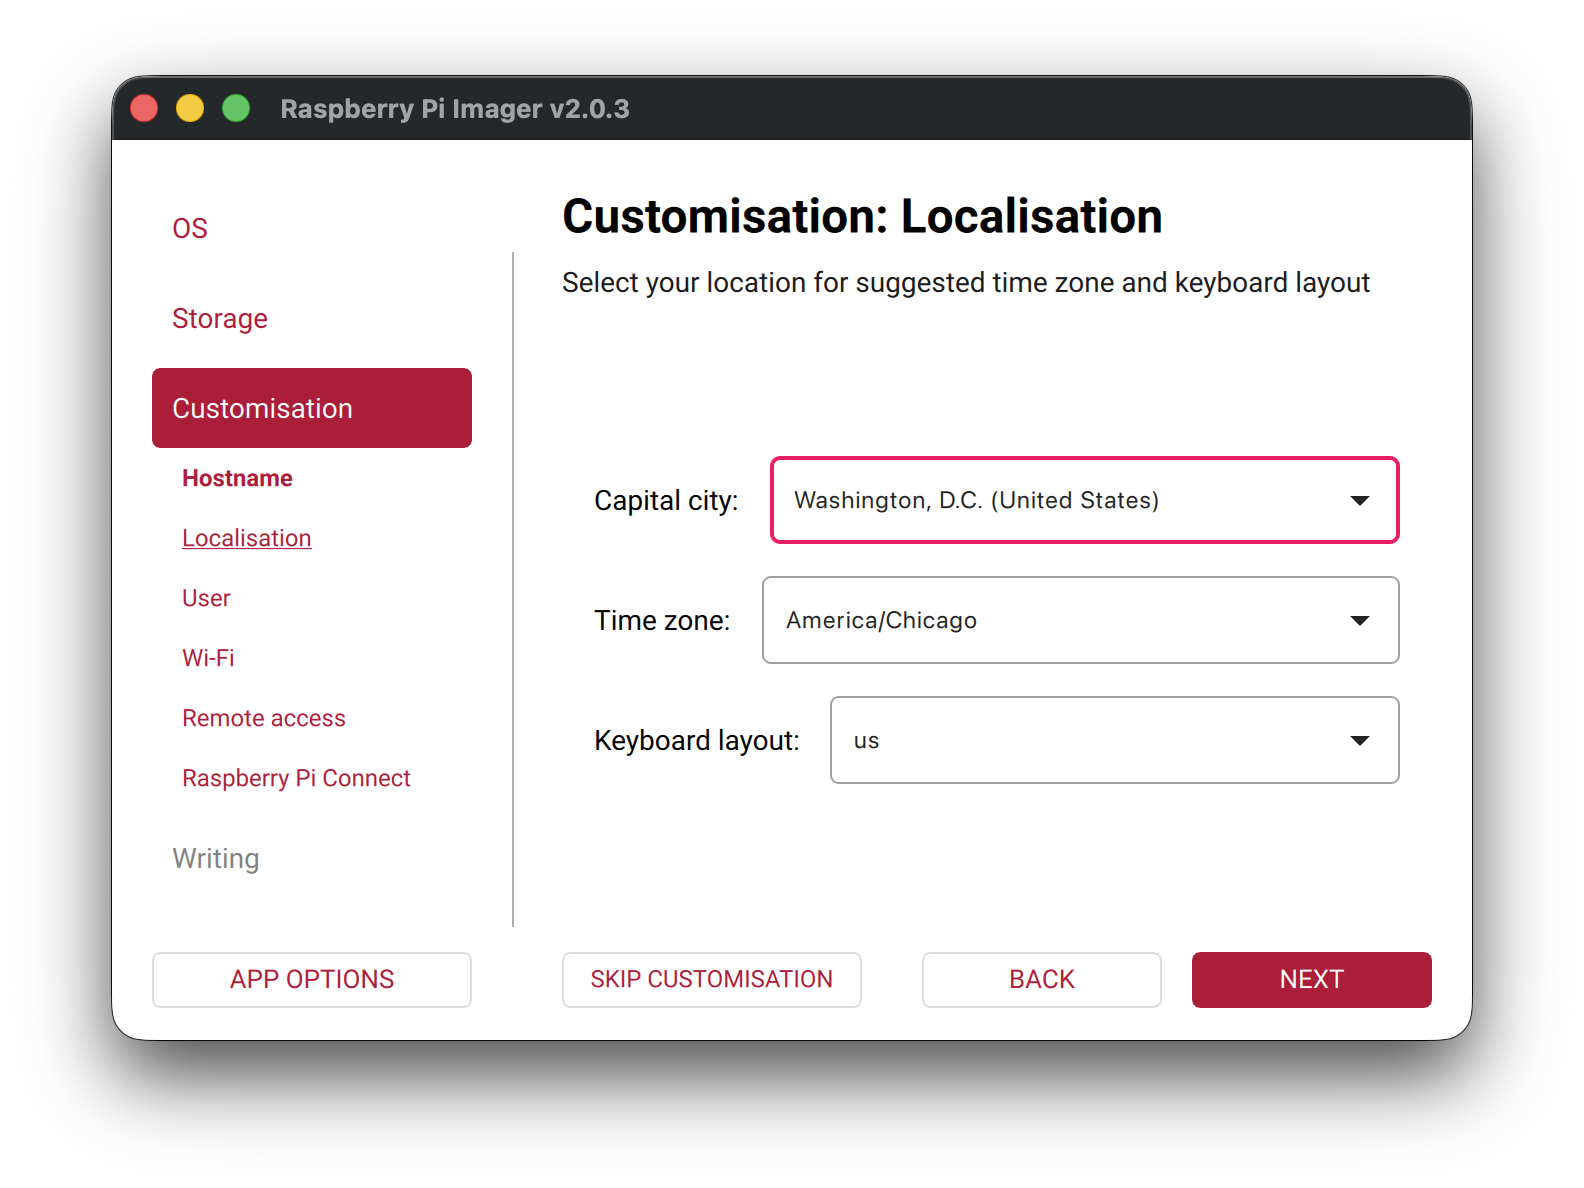
Step 5: Localization
- Locale settings: Set your timezone and keyboard layout
Step 6: Choose username
- Username and password: Set your desired credentials

Important Leave the standard
piusername and password. Part of the setup will disable remote ssh with a username/password at a later step.
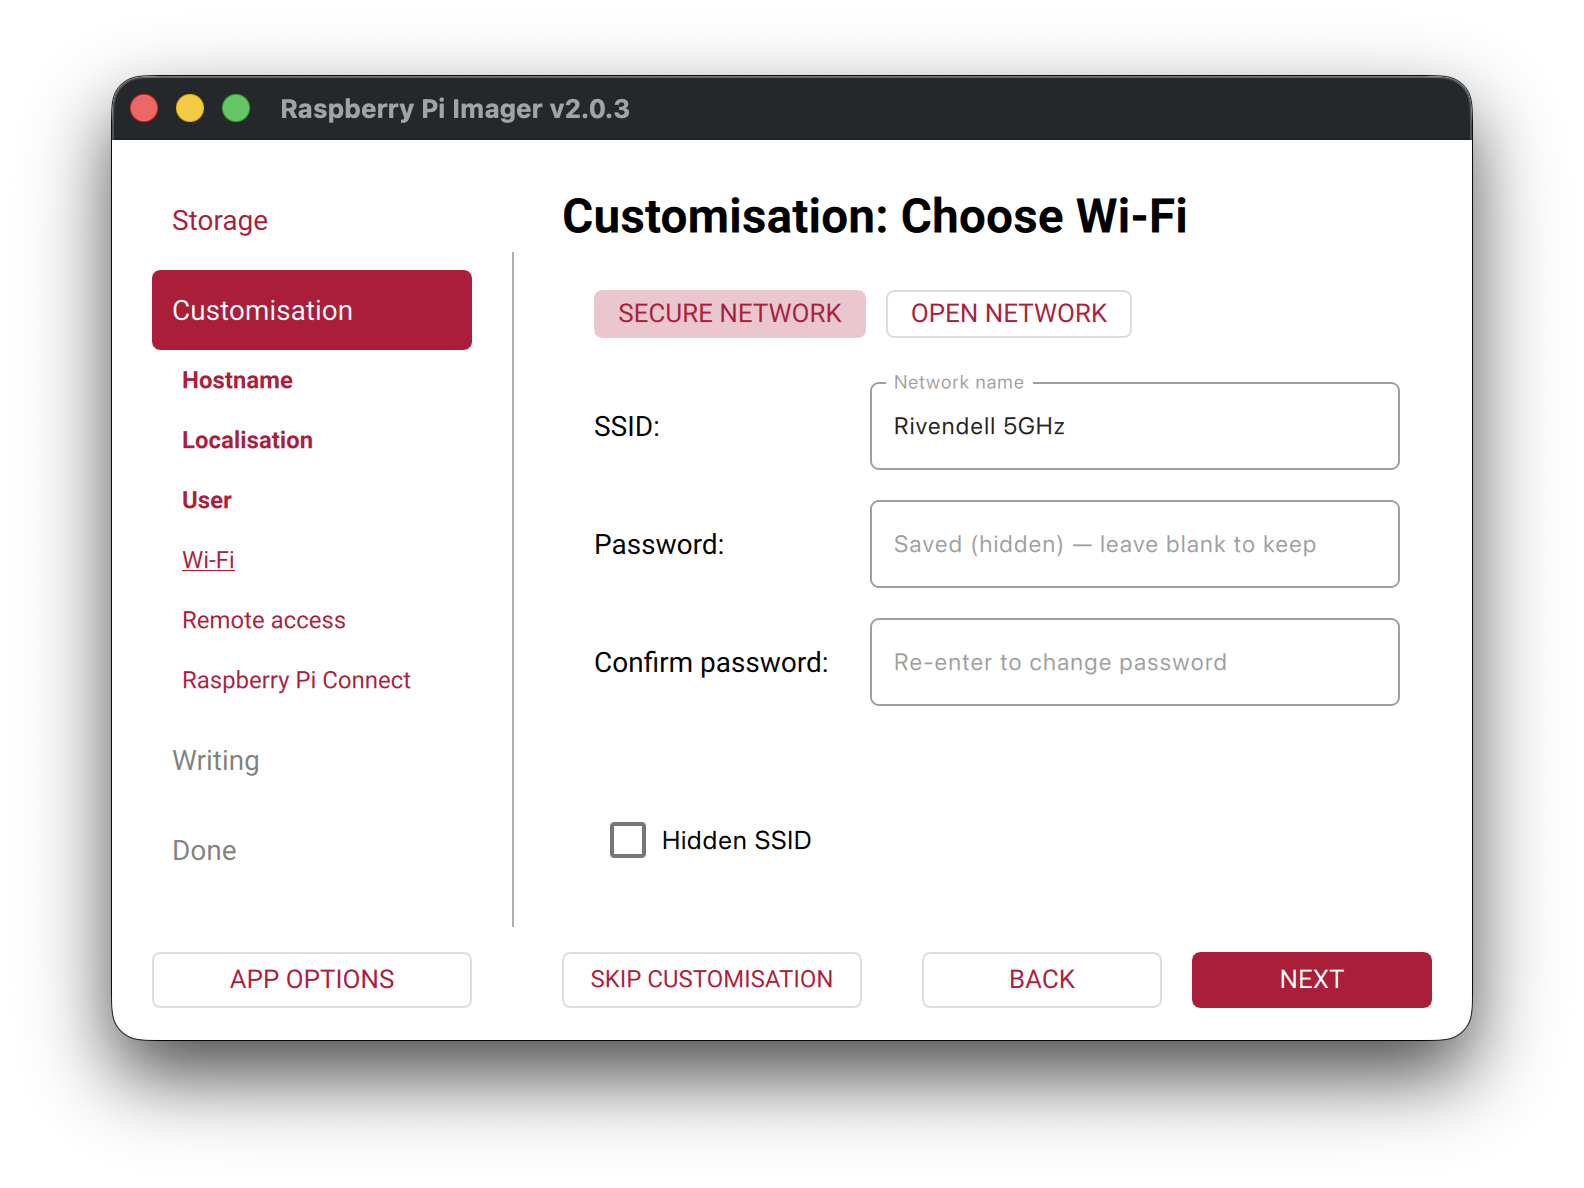
Step 7: Choose Wi-Fi
- Wi-Fi: Configure your wireless network credentials.
Step 8: Configure SSH Settings
- Enable SSH: Check the box to enable SSH
- Authentication mechanism: Select "Use public key authentication" for enhanced security
- Paste your SSH public key: Add your SSH public key (typically found in
~/.ssh/id_rsa.pub)
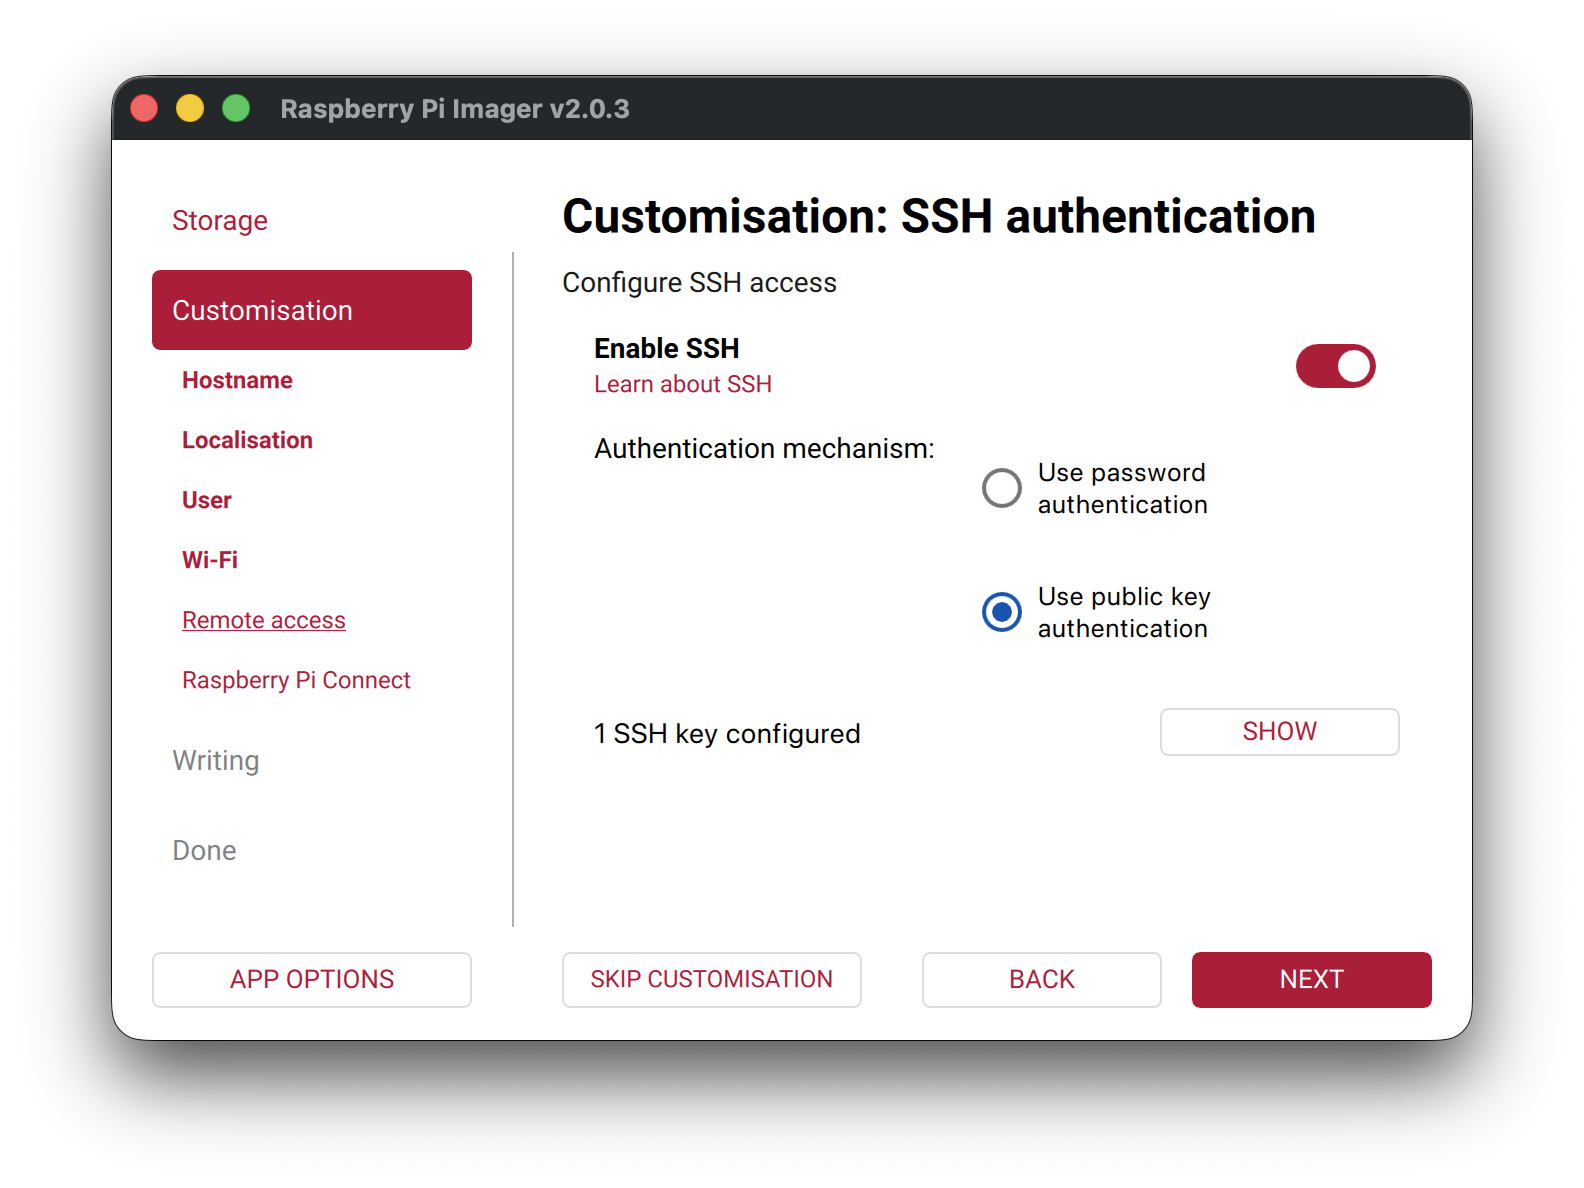
Security Note: Public key authentication is more secure than password-based authentication and is recommended for production use. If you don't have an SSH key pair, generate one using
ssh-keygenbefore proceeding.
To generate an SSH key pair (if needed):
# generate RSA key
ssh-keygen -t rsa -b 4096 -C "your_email@example.com"

# Display your public key to copy
cat ~/.ssh/id_rsa.pub
Step 9: Raspberry Pi Connect
If you have a Raspberry Pi Connect account, you can enable it here.

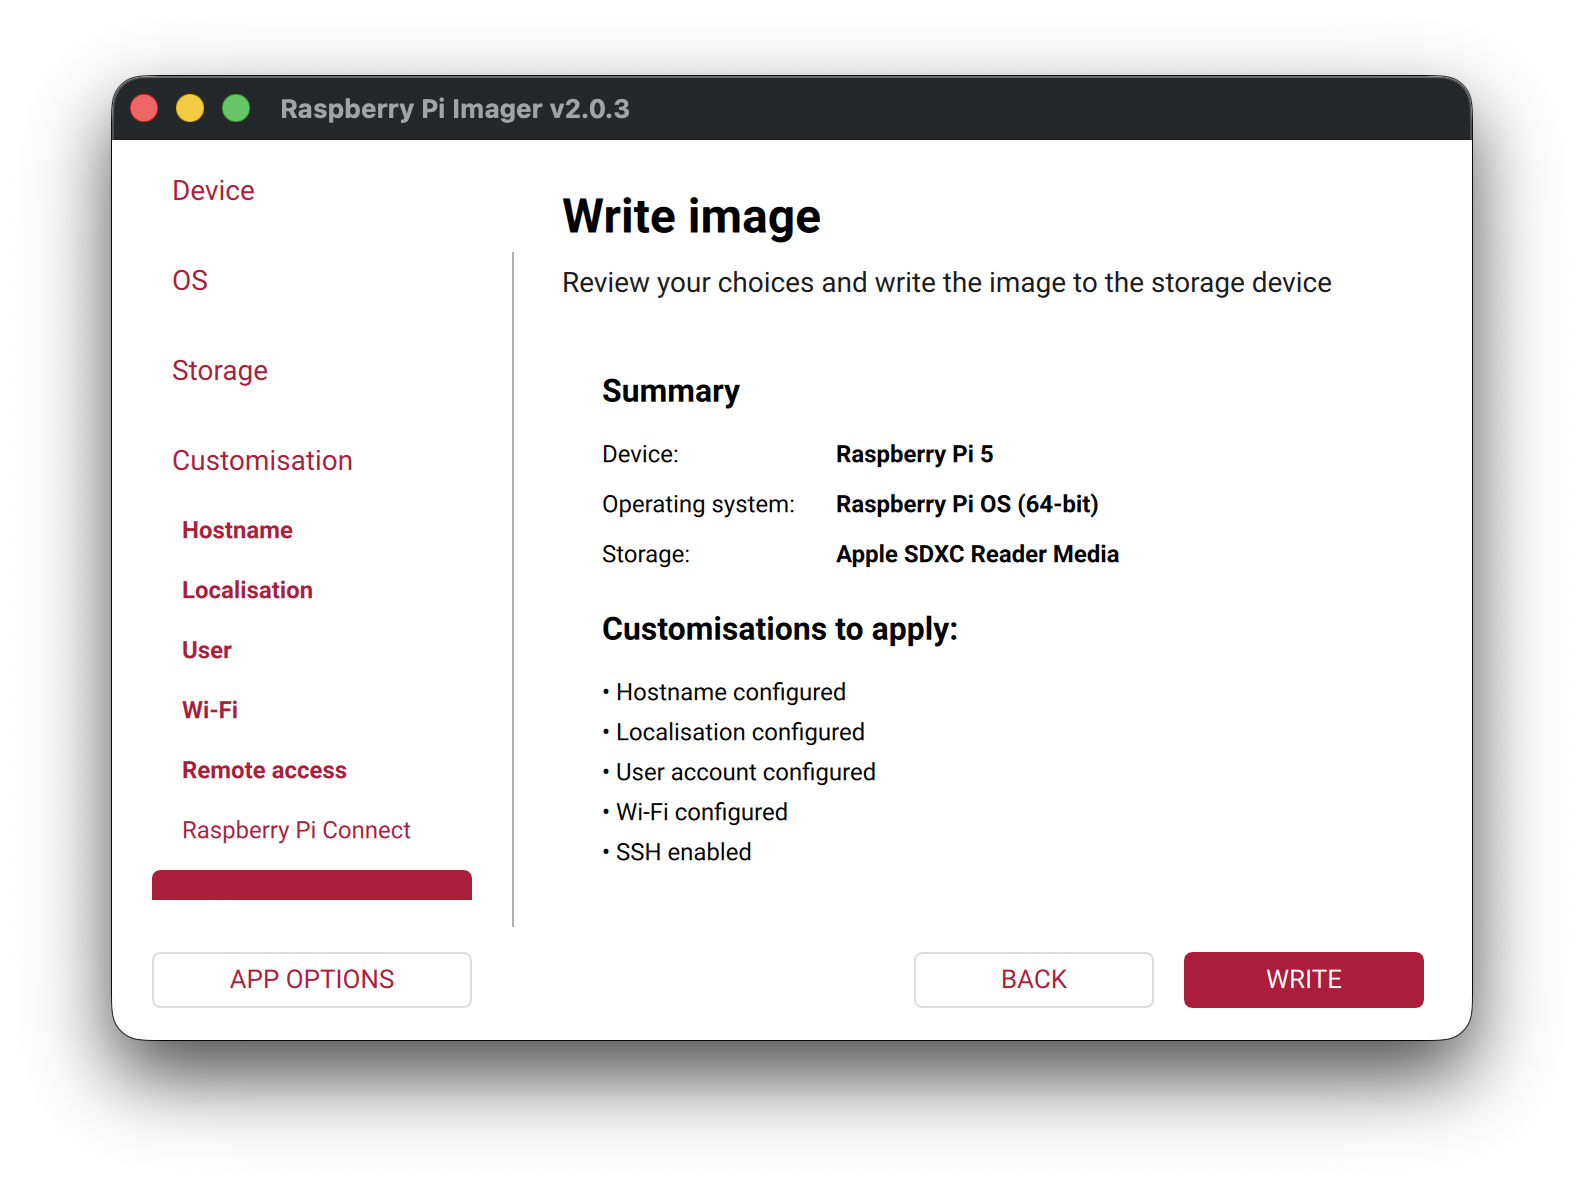
Step 10: Write image
The imager will download the OS (if needed), write it to the microSD card, and verify the installation. This process may take several minutes.
After Writing Completes
- Safely eject the microSD card from your computer
- Insert the microSD card into your Raspberry Pi
- Power on the Raspberry Pi
- Wait 1-2 minutes for initial boot and setup
- Connect via SSH:
ssh pi@pipiece.local
# or
ssh pi@pipiece
Next Steps
Once you've successfully connected to your Raspberry Pi via SSH, proceed with the PiPiece installation:
- Run the setup script:
bash setup-pi.sh - Follow the on-screen instructions
- Access the web interface at
http://pipiece.local
Troubleshooting
Cannot connect to pipiece.local
If you cannot connect using pipiece.local, try:
- Find the Pi's IP address from your router's admin panel
- Connect using the IP directly:
ssh pi@192.168.1.xxx - Install Avahi/Bonjour service if your computer doesn't support mDNS
SSH Connection Refused
- Ensure SSH was enabled in Step 8
- Verify your public key was added correctly
- Check that the private key file has correct permissions:
chmod 600 ~/.ssh/id_ed25519
Wrong Hostname
If you used a different hostname, you'll need to update references in:
- PiPiece configuration files
- API server URLs
- This documentation